Showing posts with label Pinterest. Show all posts

Wednesday, February 15, 2012

{mini} Leap List

Thanks to Honda's latest ad campaign, people are buzzing about Leap Lists - lists of things people want to accomplish before the next major milestone in their lives, i.e. getting married, having kids, turning 40, etc. {Note: I'd like to think that Theresa and I are ahead of the game with our Year 32 lists.}

The list that's on my mind right now, however, is less grand in comparison. Below is a list of small-ish {Pinterest-inspired} DIY projects that I'd like to accomplish before Leap Day 2012, two weeks from today.


my {mini} Leap List

Put together a DIY Lego table for Dylan
Prime, paint, and hang frames for Ella's wall collage
Choose printables + easy DIY projects for Mady's wall collage
Prime, paint, and hang Ikea spice rack bookshelves
Create {more} fabric-wrapped balls for Ella's room
Put together prayer pails with the kids
Write pantry staple names on my homemade chalkboard labels

Phew. That's a big list, but luckily I choose my projects primarily on the easy-peasy factor, and I already have most of my materials gathered. Also, I might save a project or two for our March craft night.

In addition, next week marks the start of Lent so I'll be busy purging 40 bags in 40 days {link up your list here!}

Want to place bets on whether or not I'll get it all done? What are your short-term, {mini} Leap List goals?

{Photo Credits}
1. Lego Table @ Creative Thoughts from an Ordinary Mom  2. Sunshine & Love Printables @ J & A and Company  
3. Owl Printable @ Mine for the Making  4. Fabric Letter @ Little Things Bring Smiles  
5. Spice Rack Bookshelves @ IKEA Hackers  6. Fabric Balls @ Landee See, Landee Do  
7. Money Jars @ A Thoughtful Place  8. Prayer Pail @ Lu Bird Baby  9. DIY Chalkboard Labels @ A Thoughtful Place.

Thursday, January 5, 2012

Craft Night {fabric balls}


I was up way too late last night finishing up our monthly edition of craft night {previous nights here: #1 #2 #3}.

The theme for the month was Just Do It...the goal was to bring a project that was on your 2012 Crafting To Do list (thanks to Pinterest, it seems everyone has a backlog of crafty projects).


We compiled our ideas on our group JUST DO IT January pinboard and brought our favorite picks to the table.

With snacks and drinks in hand, we worked on everything from sewing to scrapbooking to stenciling, jewelry making {bird nest + tree of life pendants}, a butterfly wall collage for a new baby girl, wood blocks for a new baby (boy?), felt hearts, coasters to gift away, and my pick of the night, fabric wrapped balls.


After a few hours of serious crafting, I am thrilled with how my fabric wrapped balls turned out. I was really starting to doubt my plan before I got going. I used the directions from Landee See, Landee Do and they worked great but I'm a details girl so I'll add a couple of side notes to her instructions.


{Fabric Wrapped Balls}

Supplies:
  • Styrofoam balls - These were more expensive than I anticipated. It cost me about $20 to fill this bowl (full price). I recommend waiting for a half off sale or taking your mom with you to the craft store so you can use extra coupons like I did (thanks, Mom!). I bought three sizes: large (5"), medium (4") and small (3").
  • Fabric - You don't need much. I definitely overbought in the fabric department. For example, for the three green and blue polka dot balls in the picture above (two medium, one small), I used less than 1/4 of a yard. And make sure you pick something fun! {My new decorating philosophy: surround yourself with things you love}
  • Dressmaker pins.
  • Rotary cutting mat & cutter + sewing scissors - 24 hours ago I had no idea rotary mats even existed. I asked one of my favorite crafting friends how to cut fabric in a straight line because I knew it was going to be an issue and she saved the day. I also used a yardstick so I had a straight edge to cut against.

How-To:
  1. Cut your fabric into strips. For the large balls, I would cut your fabric into 1"-1 1/4" wide strips, for the medium balls, try 3/4"-1", and for the small you need 1/2"-3/4" strips. The length will depend on the size of your ball - you can start wrapping and then trim the fabric to the correct length.
  2. Wrap your fabric around the ball once so there's enough for a little bit of overlap. Cut fabric to the correct length if necessary. Pin.
  3. Turn the ball and repeat the wrapping in an asterisks-like pattern, ending in the same place each time so your pins all end up in the same area (you will end up with only one pin showing this way).
  4. For the final strip of fabric, I folded the end over before I pinned just to give it a little bit of a more finished look.
  5. Place in bowl or vase. Enjoy.

Thanks to Pinterest, craft nights are popping up everywhere. 
Have you hosted or attended a craft night recently?
{Please share the details!} 
Do you have a perfect craft night project to share? 
{Projects that are fairly simple and can be completed in a couple of hours -or- projects that are extra fun as a group effort?} 
Here's a chance for you to link up...


Thirty Hand Made DaysThe Southern Product Queen52 Mantels

Sunday, January 1, 2012

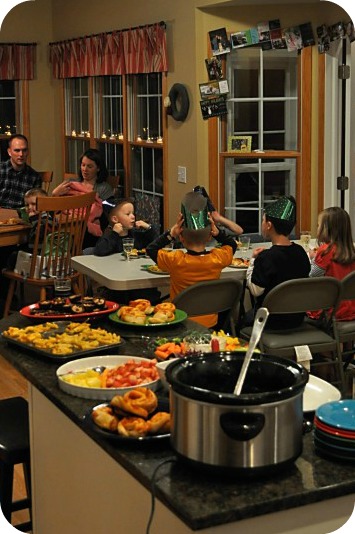
NYE 2011 {Kid Edition}

Since having kids, our New Year's Eve plan has been
to get the kids down to bed as quickly and early as possible
so we can enjoy some grown-up time before the ball drops. 


This year we took a different approach.
Since our kids (+ friends) are getting older
(ages two to seven years old, plus a 10 day old sweet baby girl)
we thought they might get a kick out of enjoying some festivities
before 2011 drew to a close. 

(And really, as usual, most of the credit should go to Pinterest.)

Our plan included:

kid-friendly food... 
and of course a healthy assortment of fruits and veggies.


...and drinks
{kid "wine" + plastic dollar store wine glasses}


craft time...


The kids did a great job on these and we were impressed that the craft held their attention for a good 30 minutes. 


They came up with some great goals for 2012, 
including learning to ride a bike without training wheels (Ella, age 5) 
and learning to Rollerblade (Gibson, age 7). 
The littlest ones in the group are hoping to stop screaming (Mady, age 2) 
and go potty in the big boy potty (Ty, age 2 1/2)
...OK, maybe those last two are their Mom and Dad's goals.

daddy wrestling...


...and party games


Happy New Year!
How did you ring in 2012?

Friday, December 16, 2011

insta.life {art & crafts}

The holiday season is in full swing.
It was a week filled with parties, ornaments, crafts and early bedtimes, along with some first-half-of-first-grade artwork thrown into the mix.


1. D's Reflections.

2. D's Peacock.


3. Can't wait to put this in her stocking.

4. Kids are in bed. Coast is clear.


5. A chocolate-y advent tradition.

6. Make your own reindeer cookie.


7. Ella's reindeer food.

8. Paula Deen's monster cookies.


9. DIY bird nest necklace. {tutorial here}

10. D's red birds.


11. Aunt Katie gets out the glue gun for her favorite Spartan super fan.

12. Small group ornament gifts. {inspiration here}


life rearranged

Thursday, December 8, 2011

Craft Night {yarn wrapped ornaments}

Another Craft Night went off without a hitch. Word travels fast and Theresa was gracious enough to host our largest craft night yet complete with some amazing details.


Below is a sampling of the crafts that were completed - the theme was ornaments, but it is always an option to bring something outside the theme:


I decided on monograms and stars and worked with two of my favorite crafting mediums: Mod Podge and yarn (not at the same time, of course). The yarn-wrapped ornaments {tutorial here} took the prize as my favorites, both because they were easy-peasy and because I love their warm and fuzzy feel.


The way women's eyes light up when you talk about craft night makes me realize that most of us are craft night deprived. I'm not sure if it's the actual crafting we are after, or the community, laughter and the sense of actually, physically accomplishing something in this virtual, high-tech world.

If you'd like to try your hand at starting up a craft night, here are our tips:

  • Pick a craft or a theme. Either way works - you can pick an actual craft complete with a supply list if you have a lot of first-time crafters who would appreciate the extra guidance -or- you can pick a theme (yarn, ornaments, Mod Podge, etc.) if you want to give people a little more freedom.
  • Pick a date. Choose a day that easy to remember - the first Monday of the month, for example. We start at 8pm which allows most of us to help our husbands get the kids to bed before we leave...happy husbands don't seem to mind craft night :)
  • Invite your guests. You can start small and see who shows up if it's overwhelming to think about a big group in your house. Or take the invite-everyone-you-know approach and sit back and watch your worlds collide. Either way, find an easy-to-use on-line invite system - we use Facebook and set the Event settings to Invite-Only to keep the Wall more private.
  • Start a group Pinterest board. Create a new board on Pinterest (select Me + Contributors to allow others to post to it) and add your guests' names. This is a fun way to collaborate leading up to the event.
  • Make a snackage plan. The hostess usually takes care of the drinks, everyone else brings a snack to share. Keep it simple. 
  • Rotate hostess duties. After each craft night, follow-up with your friends and see who would like to host the next craft night. It's important to keep the ball rolling and it's nice to have a variety of hostesses - it keeps things fresh and spreads out the responsibilities.


Consider yourself warned: women will show up in droves. Craft on!


Thursday, November 3, 2011

Craft Night {yarn-wrapped letter}


Now that we've started crafting, we just can't stop. The lovely KMac opened up her home to us last night and hosted our second craft night.


We worked on all sorts of things, mostly yarn related, including Thankful Treesyarn wrapped wreaths, a yarn wrapped monogram, and a coffee filter wreath.

I made a couple yarn wrapped wreaths last Thanksgiving {here & here} so I decided to expand my horizons and try a yarn wrapped monogram.

Our projects in various states of done-ness.

My "E" ended up being a lot of fun to do - the end result is perfectly imperfect and I realized that I had to embrace that pretty early on. I did learn a thing or two and if I did another one, I would take a little bit more care to cover my corners. Every letter is going to have it's own unique set of problems depending on whether you have a straight or curved letter. If you try it, I would study a few on Pinterest and then have a good plan in place before you start - you will need to wrap it several times in different directions.

The big star of the night was Kara's fabulous {giant) Sizzix machine. We used it to cut our felt flowers to embellish our yarn-y projects.


This morning I have a happy little 4 1/2 girl who loves her new E for her room (she's already asking where the L's and the A are). I call that a craft night success!

Friday, October 14, 2011

Done List

I knocked two things off my To Do list this week. They are now officially moved to my Done List.

First up: hanging a couple of Ikea BYGEL rails + s-hooks in our closets. This was a Pinterest inspired solution (I'm sure you're starting to catch on by now that all good ideas come from Pinterest) and they've been sitting in the package ever since I bought them a month or so ago.

My two favorite parts of this project...1) it was cheap - $1.99 for the rail and $.99 for the s-hooks, and 2) it's brilliant - no more wasted space behind the closet door and no more little things cluttering up my closet.


Project #2: moss-covered letters. These were one of my very first pins and I knew they would look great with all the red in our living room and bring in a natural-ish (as natural as moss glued on cardboard can be) element as well.

This project was idiot-proof, I kid you not. All it took were some cardboard letters, a roll of moss, a hot glue gun and a pair of scissors. I thought it would be a lot harder to cover the letters and hide seams but moss might just be the most forgiving crafting material on the planet. Total project time: an hour and a half.


What sorts of Pinterest-inspired projects have you been up to lately?

Thursday, October 6, 2011

Craft Night: Let's Get Clippy


I'm not an overly crafty kind of girl, but something about hosting a ladies' craft night sounded fun to me and my favorite gal pals/partners in crime (plus it's #15 on my list).

I'm blaming Pinterest: so much inspiration to be found there and actually following through on a Pinterest-y idea helps justify the amount of daily time I spend searching and pinning.


And apparently my friends were all crafting undernourished. For the first time in my party inviting life I had a 100% YES, I'M COMING! response rate. Who knew these girls were just waiting and hoping to be invited to a gathering where Mod Podge takes center stage??


The craft of the evening was Mod Podging paper onto clipboards (tutorial here) - some girls are planning to use these for organization at home (i.e. a clipboard for each child's school papers) and some are planning to give them as gifts.

So for three hours we ate and plotted and cut and Mod Podged and laughed and crafted...and problem solved a few crafting mishaps.

We might not be Martha Stewarts in the making but we did get out for an evening and forget about the laundry and our needy adorable toddlers and, as an added bonus, we got in touch with our inner craftiness. In a busy, virtual world, there is something to be said for working with your hands and actually physically accomplishing something.

Viola! {A few of our finished products below - mine, T's and KMac's}


Our mantra: Finished is better than perfect.

Until next month!


Related Posts Plugin for WordPress, Blogger...